Design Your First Metal Sign
A beginner-friendly workflow for creating a readable laser-cut metal sign in the Metal Marvel designer.
Start with a simple readable sign, confirm the words and size work, then add style, material choices, mounting, and AI help only when the base design is clear.
Start With The Sign's Job
Before choosing fonts or metal, decide what the sign must do. A house number needs instant legibility from the street. A gate sign needs durable mounting. A cafe sign needs brand personality without becoming fragile on the laser.
Write one plain version first. The designer can make it bolder, wider, taller, or more decorative after the message is right.
Build The First Version
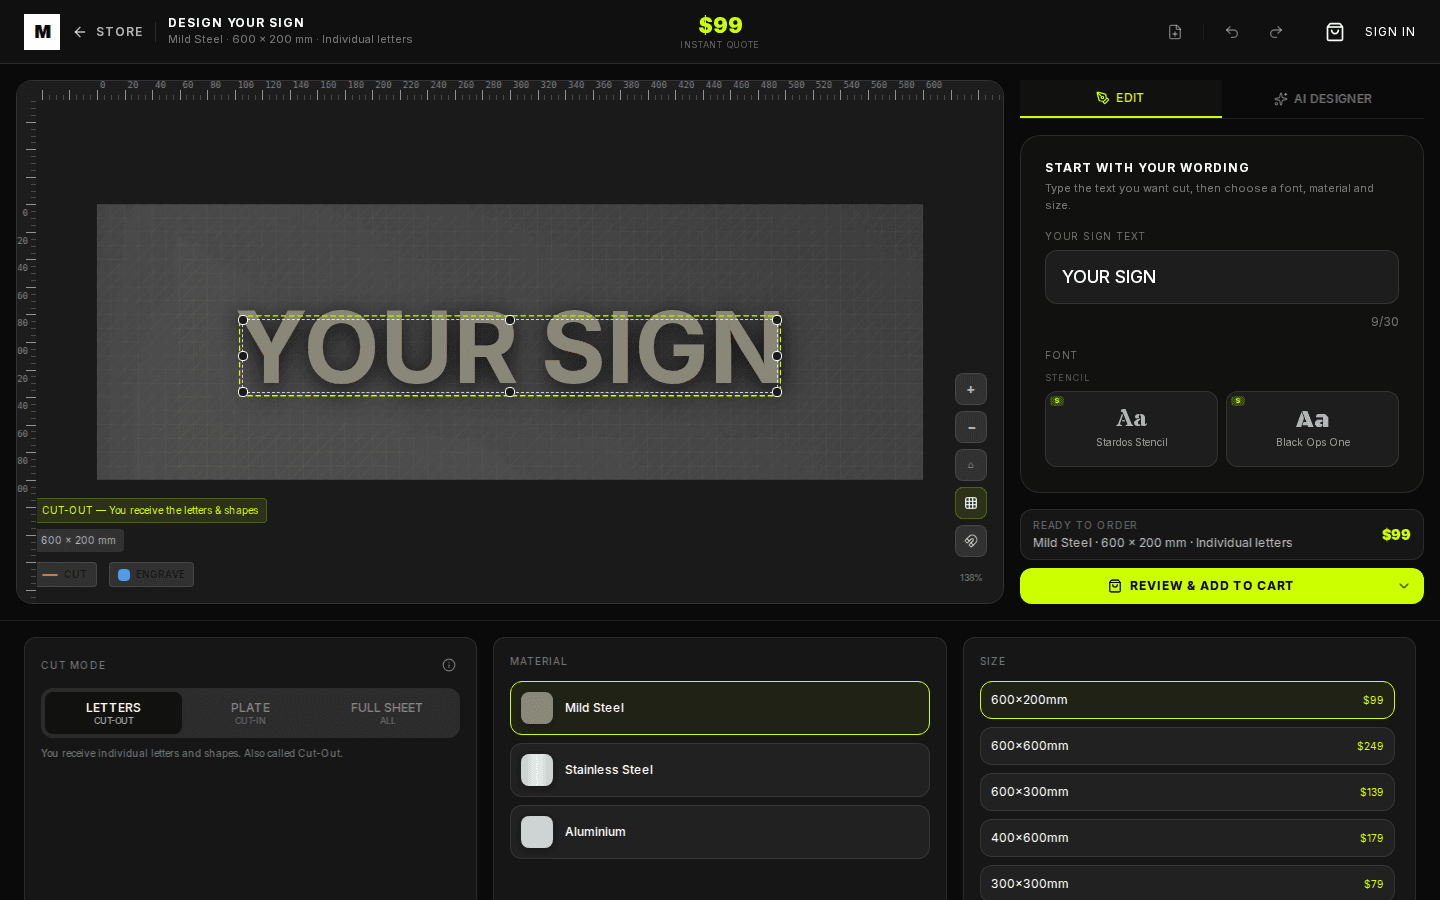
- 1. Set the wording: Enter the main text and keep spelling exactly as it should be cut. Use line breaks where the finished sign needs visual separation.
- 2. Pick a readable font: Choose a strong font before a decorative one. Fancy scripts can work, but the first pass should prove that the sign reads clearly.
- 3. Choose a useful size: Resize until the sign feels proportional to the wall, gate, post, or entry. Bigger is not always better; proportion matters.
- 4. Select material: Use mild steel for a raw patina look, stainless steel for clean corrosion resistance, or aluminium when weight matters.
Add Style After The Layout Works
- Use one focal point: A name, number, or logo should be the thing people notice first.
- Avoid tiny extras: Small stars, leaves, or curls can look good on screen but disappear visually once mounted outdoors.
- Check the quote while editing: Material, size, engraving, and cut style can affect the live price.
Where AI Helps
AI Designer can make the current sign bolder, suggest a cleaner font, add a simple symbol, switch material, or turn a rough idea into a more balanced layout. Ask for one change at a time so the result stays editable.